ShopDreamUp AI ArtDreamUp

Deviation Actions


![.: Look At That Boy Go! :. [AP]](https://images-wixmp-ed30a86b8c4ca887773594c2.wixmp.com/f/5304d732-03a8-41dd-8df8-ac577235a97b/dcacgew-f502c0ff-f2a0-4251-b88d-f59a910c6c83.png/v1/crop/w_92,h_92,x_10,y_0,scl_0.077900084674005/___look_at_that_boy_go______ap__by_kalmanen_dcacgew-92s.png?token=eyJ0eXAiOiJKV1QiLCJhbGciOiJIUzI1NiJ9.eyJzdWIiOiJ1cm46YXBwOjdlMGQxODg5ODIyNjQzNzNhNWYwZDQxNWVhMGQyNmUwIiwiaXNzIjoidXJuOmFwcDo3ZTBkMTg4OTgyMjY0MzczYTVmMGQ0MTVlYTBkMjZlMCIsIm9iaiI6W1t7ImhlaWdodCI6Ijw9MTE4MSIsInBhdGgiOiJcL2ZcLzUzMDRkNzMyLTAzYTgtNDFkZC04ZGY4LWFjNTc3MjM1YTk3YlwvZGNhY2dldy1mNTAyYzBmZi1mMmEwLTQyNTEtYjg4ZC1mNTlhOTEwYzZjODMucG5nIiwid2lkdGgiOiI8PTE2ODkifV1dLCJhdWQiOlsidXJuOnNlcnZpY2U6aW1hZ2Uub3BlcmF0aW9ucyJdfQ.FgO-jZrAwaikrnfbSgRgNukLaqliiyxqy6IPnL4u1Xw)
![.: Angery Ponies :. [Stat Grid: 55 stats]](https://images-wixmp-ed30a86b8c4ca887773594c2.wixmp.com/f/5304d732-03a8-41dd-8df8-ac577235a97b/ddfc1xe-27c5687d-8e3a-47be-a749-0ab9ad89ca46.png/v1/crop/w_92,h_92,x_0,y_8,scl_0.038493723849372,q_70,strp/___angery_ponies_____stat_grid__55_stats__by_kalmanen_ddfc1xe-92s.jpg?token=eyJ0eXAiOiJKV1QiLCJhbGciOiJIUzI1NiJ9.eyJzdWIiOiJ1cm46YXBwOjdlMGQxODg5ODIyNjQzNzNhNWYwZDQxNWVhMGQyNmUwIiwiaXNzIjoidXJuOmFwcDo3ZTBkMTg4OTgyMjY0MzczYTVmMGQ0MTVlYTBkMjZlMCIsIm9iaiI6W1t7ImhlaWdodCI6Ijw9MzI3MCIsInBhdGgiOiJcL2ZcLzUzMDRkNzMyLTAzYTgtNDFkZC04ZGY4LWFjNTc3MjM1YTk3YlwvZGRmYzF4ZS0yN2M1Njg3ZC04ZTNhLTQ3YmUtYTc0OS0wYWI5YWQ4OWNhNDYucG5nIiwid2lkdGgiOiI8PTIzOTAifV1dLCJhdWQiOlsidXJuOnNlcnZpY2U6aW1hZ2Uub3BlcmF0aW9ucyJdfQ.QpLR4MdqVNTqcgzk2gk_XgxgLjun0_wZnbweUeFXMeU)


Description
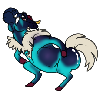
Finallyyyy...? I know this is gonna be a piece that I'll definitely finish within a reasonable time, so I figured I'd make a walkthrough of it and show my process from start to finish. This is something that's been a long way coming xD;; I'll update this image whenever there's progress on the image, so today it will most likely get lines and possibly some version of a background/colour key. This is sort of a gift for someone, so I won't be naming the horses in the image but as you can see it's a mare and stallion pair. The stallion (front horse) is trying to catch up to the mare, who is looking back in a bit of a mischevious/playful way.
Part I - sketching - image here: sta.sh/01s994a3zjjj
I sketch using a basic airbrush around 70-80% opacity. I usually use a rather big brush and later on line with the same brush, but as smaller size.
Okay so as you can see, this is a very loose sketch, not really worried about anatomy just generally placing the horses and trying to decide what kind of scenery I'll be placing them in. I really want to try out things like cartoony clouds and stuff like that; I've been watching an Okami playthrough so maybe gonna try emulate the game style? Or something. I'd like to get away from my usual style of grass, clouds and skies, try out something different and more stylized. Stylization in general is something I struggle with (along with backgrounds), so what better place to do that than art for someone else. xD
After a sketch like this (or before, depending how specific my idea is) I usually go browsing generic background ideas, googling things like "forest," "morning" etc or maybe a type of tree or something. Other times I just wing it or go from a ref pic of my own collection, placing the horses in a familiar environment so I know how everything works there and it's easier to place the horses there and whatnot. I'll start working with colours and start shaping out the background, but more about that in the next part.
Part 2 - colour key/ideas and finalizing background idea - image here: sta.sh/0yoab61avgy
I put this in three parts so I'll explain every part separately. Like I said before, I've been watching Okami and the heavylined, brush-like style of the game really gets to me. I absolutely love it and wanted to try something similar. Sooo what I did was google Okami, and from there specifically scenery. I changed a lot of things at this point, mainly the proportions and what is where. Gave up on cartoon clouds for another time, and gonna do a morning light kind of scene.
2A - The inspiration/idea board. Also looking at the tones used in the these images and gonna try using a similar colour palette. I often take screencaps or copy various images into one big mashup to use as a inspiration board or colour key. Here I just wanted to see the general style and key elements; water, grounds, grass and the cherry trees. The last one gave me an idea - I would insert a stylized tree to my image.
2B - The actual background sketch. I used very heavy lines and thinner ones for detailing, as is the style of the game. However, intead of cherry tree I wanted to do birches, because I think them as very beautiful, interesting trees. If I had to draw one type of tree for the rest of my life, it'd be birches. Birches everywhere. Also light source moved to the middle of the image, so the horses will be light from the behind and the mountain-y things around will work as dividers and give a nice enveloping feel to everything.
2C - The horses blocked in with neutral grey and the image is flipped. Blocking in the horses will show approximately how much of the background will be seen, and if there's specific elements you want the viewer to see, they need to be outside of this area unless your horses are made of glass Flipping is a really good technique everyone should use, you will see anatomical errors and other odd things. The birch on top of the hill-mountain-whatever thing used to have a branch on it, but when I flipped the image it looked REALLY weird, so I removed it altogether.
Part 3 - Lineart
I know it's been a long while since I updated this, apologies! I'll try to get parts out more often now.
L1 - Yes, this seems like a terrible time to change everything. Sometimes, when I'm lining things I just look at what I've done and see that it doesn't work. Something is off. I usually try to work at it (and did it this time too, I end up scrapping the pose for other use), but when it feels like it's just not there, I change it completely. I quickly sketched up a new pose which I like more, still works for the idea (he has to gallop to keep up with the lady). Brush settings shown next to them is what I used for lining the horses.
L2 - I used a different brush than usual to get the "Okami" feeling of heavy, paintery lines. I don't usually leave the lineart to show in backgrounds and do just some random paintery things; this is definitely an experiment on new style and doing things differently from the usual. Brush setting shown next to the background is what I used to create the lines.
L3 - Here you can see how my linearts work, I line mane and tail (and feathering, if there is any) separately from the body. I combine them later on, but for easier colouring process I keep the separated body lineart. This I use to select the area when I paint the horse later on. After I have finished lining everything, I take a duplicate of the horse lineart, hide the original and erase the parts where the mane goes over the neck and whatnot. That will be what the final showing lineart/painted in and if needed, I always have the original lineart to work from. The same technique is used on the parts where Mare's leg and tail are behind Stallions feet.
L4 - Finalized linework with everything, horses and background together. Showing the right side version from L3 and everything is ready for colour
Let me know what you guys think, should I go more in depth about something or leave something out orrr?? Is there something specific you want me to concentrate on? Let me know and I'll try to cater to your needs, this is for you all fab people out there after all
Part I - sketching - image here: sta.sh/01s994a3zjjj
I sketch using a basic airbrush around 70-80% opacity. I usually use a rather big brush and later on line with the same brush, but as smaller size.
Okay so as you can see, this is a very loose sketch, not really worried about anatomy just generally placing the horses and trying to decide what kind of scenery I'll be placing them in. I really want to try out things like cartoony clouds and stuff like that; I've been watching an Okami playthrough so maybe gonna try emulate the game style? Or something. I'd like to get away from my usual style of grass, clouds and skies, try out something different and more stylized. Stylization in general is something I struggle with (along with backgrounds), so what better place to do that than art for someone else. xD
After a sketch like this (or before, depending how specific my idea is) I usually go browsing generic background ideas, googling things like "forest," "morning" etc or maybe a type of tree or something. Other times I just wing it or go from a ref pic of my own collection, placing the horses in a familiar environment so I know how everything works there and it's easier to place the horses there and whatnot. I'll start working with colours and start shaping out the background, but more about that in the next part.
Part 2 - colour key/ideas and finalizing background idea - image here: sta.sh/0yoab61avgy
I put this in three parts so I'll explain every part separately. Like I said before, I've been watching Okami and the heavylined, brush-like style of the game really gets to me. I absolutely love it and wanted to try something similar. Sooo what I did was google Okami, and from there specifically scenery. I changed a lot of things at this point, mainly the proportions and what is where. Gave up on cartoon clouds for another time, and gonna do a morning light kind of scene.
2A - The inspiration/idea board. Also looking at the tones used in the these images and gonna try using a similar colour palette. I often take screencaps or copy various images into one big mashup to use as a inspiration board or colour key. Here I just wanted to see the general style and key elements; water, grounds, grass and the cherry trees. The last one gave me an idea - I would insert a stylized tree to my image.
2B - The actual background sketch. I used very heavy lines and thinner ones for detailing, as is the style of the game. However, intead of cherry tree I wanted to do birches, because I think them as very beautiful, interesting trees. If I had to draw one type of tree for the rest of my life, it'd be birches. Birches everywhere.
2C - The horses blocked in with neutral grey and the image is flipped. Blocking in the horses will show approximately how much of the background will be seen, and if there's specific elements you want the viewer to see, they need to be outside of this area unless your horses are made of glass
Part 3 - Lineart
I know it's been a long while since I updated this, apologies! I'll try to get parts out more often now.
L1 - Yes, this seems like a terrible time to change everything. Sometimes, when I'm lining things I just look at what I've done and see that it doesn't work. Something is off. I usually try to work at it (and did it this time too, I end up scrapping the pose for other use), but when it feels like it's just not there, I change it completely. I quickly sketched up a new pose which I like more, still works for the idea (he has to gallop to keep up with the lady). Brush settings shown next to them is what I used for lining the horses.
L2 - I used a different brush than usual to get the "Okami" feeling of heavy, paintery lines. I don't usually leave the lineart to show in backgrounds and do just some random paintery things; this is definitely an experiment on new style and doing things differently from the usual. Brush setting shown next to the background is what I used to create the lines.
L3 - Here you can see how my linearts work, I line mane and tail (and feathering, if there is any) separately from the body. I combine them later on, but for easier colouring process I keep the separated body lineart. This I use to select the area when I paint the horse later on. After I have finished lining everything, I take a duplicate of the horse lineart, hide the original and erase the parts where the mane goes over the neck and whatnot. That will be what the final showing lineart/painted in and if needed, I always have the original lineart to work from. The same technique is used on the parts where Mare's leg and tail are behind Stallions feet.
L4 - Finalized linework with everything, horses and background together. Showing the right side version from L3 and everything is ready for colour
Let me know what you guys think, should I go more in depth about something or leave something out orrr?? Is there something specific you want me to concentrate on? Let me know and I'll try to cater to your needs, this is for you all fab people out there after all
Image size
712x1223px 455.21 KB
© 2014 - 2024 kalmanen
Comments13
Join the community to add your comment. Already a deviant? Log In
Yay, revealing more Kalma-secrets! 
Thank you for sharing, dear!
Thank you for sharing, dear!